
The inbuilt mic on laptops is generally ignored, however, they can be really helpful when you are unable to find your primary mic, or it has stopped working. And considering the quality of inbuilt mic has improved enough to attend meetings or have voice chat in game, it is nice to have it in working condition.
So, if the inbuilt mic on your laptop has stopped working, especially on certain application, such as Microsoft Teams, Google Meets, any game etc. then it might be good idea to diagnose the issue and try to fix it. There are number of steps you can take to identify and fix the issue.
#1 – App Specific Issue:
It is better to know whether the issue only exists on a single app or every application on your computer. So, check if your mic is working on other apps or not. If it is not working anywhere then proceed to option #2.
You can check it in various apps such as the pre-installed Recorder app. If the mic is working on other apps, then it might be blocked by your antivirus or Windows.
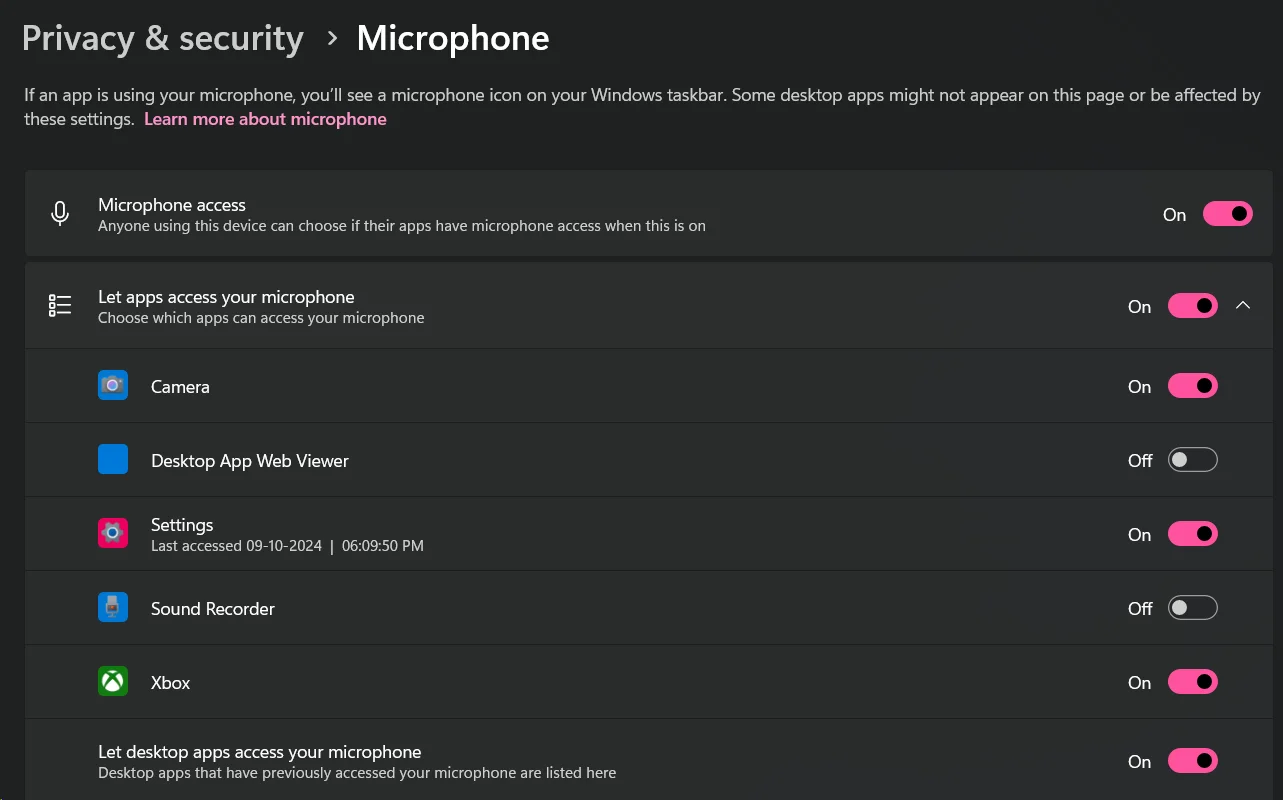
For Windows, go to Settings > Privacy & Security > Microphone.
Find the app where you are having issues and make sure that the toggle on the right side is enabled for it. If it is already enabled, then it might be blocked on your antivirus. The steps vary for each of them, so you will need to find where to find it yourselves.
#2 – Check Mic Settings:
There are two things you will be checking here:
- Check if your inbuilt microphone is available in the settings. If not, then skip this section entirely and continue from option #3.
- Check if your microphone is set as default, if it is then check whether the microphone is working or not and whether the volume is enough or not.
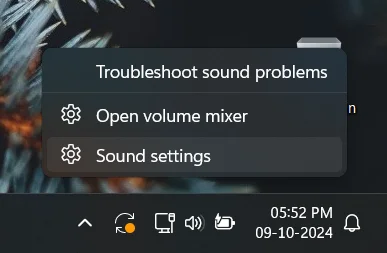
– Open Sound settings by right clicking on Sound icon in the tray icons.
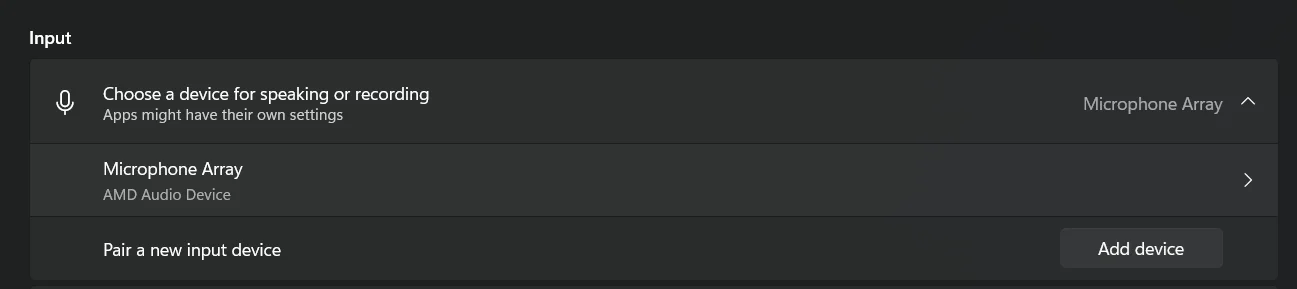
– Now check the Input section and select your laptop’s mic. Make sure you have disconnected your headphone or any other microphone from the laptop, so you don’t get confused.
If you are able to find your microphone there, simply click on it and make sure that it is set as default and its volume is high enough.
After this, try using the Test your microphone option. If it is showing any percentage then the mic is working. Just increase the volume if it is not enough. You can use the inbuilt Recorder app to check whether the volume is enough or not.

For some inbuilt mics, you can increase the mic volume further by going to Control Panel > Sound > Recording > Right click on your laptop microphone > Properties > Levels. Now you can increase the value for Microphone Boost.
#3 – Check Windows Update History:
If your mic is not working in any application, then it might be due to wrong or corrupted drivers. The usual culprit for this is Windows Update, especially for AMD. So, if your mic was working fine until some day and you know when it last worked, check the recently updated drivers by Windows.
To do so, you can go to Settings > Windows Update > Update history > Driver Updates.
The drivers can be one of these depending on your processor:
- AMD Audio CoProcessor.
- Intel Smart Sound Technology.
- Realtek HD Audio Driver.
- Qualcomm Aqstic Audio and/or Qualcomm Hexagon DSP.
In some cases, the name might be different in update history. However, you can check the version for the drivers I mentioned above depending on your processor. You can check that in Right click on Start Menu > Device Manager > System devices.
To know how to fix it, you can proceed to the next option.
#4 – Update or Install Drivers Properly:
If you found any of those drivers in the update history, then you might want to rollback to the previous version to test whether everything works or not.
It would be best to install the audio drivers from your laptop manufacturer’s website instead of doing it manually. However, if you want to do it manually for any reason then:
Open Device Manager > System devices.
Now, find the driver which Windows updated recently. Note down the version they updated to or take a screenshot. It will be helpful for reverting back to the drivers, if updating to a different driver does not help.
Right click on the driver > Update driver > Browse my computer for drivers > Let me pick from a list of available drivers on my computer > Untick Show compatible drivers.
You can see some available drivers on the right side. Don’t randomly select any driver and carefully select the one you need to update.
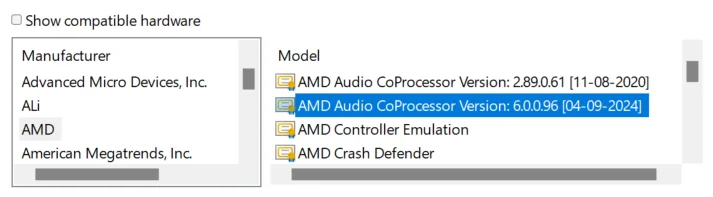
For example, here I want to update my AMD Audio CoProcessor driver to 6.0.0.96 (2024) version, since Windows Update kept installing the 2.89.0.61 version on my laptop and breaking the mic. However, in your case, you may need to update to older version if Windows updated your driver to unsupported newer version.
If updating the version does not help, install the previous version again.
In some cases, you might not see anything and if you are not sure about the driver, then it would be best to use drivers from your manufacturer’s website. You can still select the manufacturer on the left and then select the drivers on the right side, but installing incorrect drivers may break something else.
#5 – Update Chipset Drivers:
Try downloading the latest chipset drivers from your laptop OEM’s website. Chipset drivers also vary from device to device, so download the one for your laptop only.
If your laptop manufacturer is having really old drivers for your laptop then you can also try downloading the drivers from your processor manufacturer’s website (i.e., Intel, AMD etc.).
Conclusion:
I hope you were able to fix your laptop’s inbuilt mic after following the steps mentioned in this article. If nothing helps then it would be best to take your laptop to authorized service centre, especially if it is under-warranty.


Leave a Comment